Creamy Dreamy Rice Pudding
Creamy and dreamy is how my kids described this wonderful rice pudding. Try this simple recipe soon for the best creamy dreamy rice pudding and taste the deliciousness. Enjoy!

When in the mood for a comforting and old fashioned dessert, look no further than this creamy dreamy rice pudding recipe.
With a hint of cinnamon and warm vanilla flavor, this is very simple to throw together with pantry ingredients you probably already have on hand.
This particular recipe reminds me so much of the rice pudding we get at diners all around New York. They serve it chilled with a big dollop of whipped cream and a cherry. It’s out of this world delicious. So glad I now make this at home so we can all enjoy creamy dreamy rice pudding anytime we want.
Using an instant rice that only takes one to two minutes to prepare makes for the easiest recipe that’s quick and foolproof.
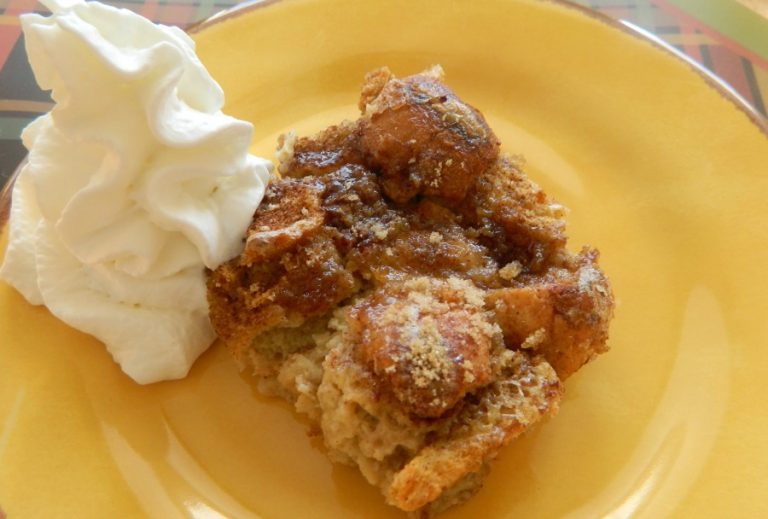
Serve warm from the pan or chilled with a dollop of whipped cream. Also great for breakfast with fresh berries on top. Anyway is the right way with this delicious recipe for creamy dreamy rice pudding.
Creamy Dreamy Rice Pudding
Yields: 4 servings

What you’ll need to make creamy creamy rice pudding…
Here are the simple everyday ingredients:
- 1 3/4 cups cooked long grain white rice, I used Veetee, or any long grain instant white rice or any cooked white rice.
- 2 cups whole milk
- 1/4 cup granulated sugar
- 1/2 teaspoon sea or kosher salt
- 1 1/4 teaspoons vanilla extract
- 1 egg, lightly beaten
- 1 tablespoons unsalted butter
- 1/4 teaspoons cinnamon, more for garnish, optional
- whipped cream, optional

How is creamy dreamy rice pudding made…
Here are the easy directions:
- Cook instant long grain rice in the microwave or according to directions. Fluff up with fork and measure 1 1/2 cups cooked rice. Save the rest for another favorite rice dish.
- In a large saucepan, combine the milk, rice, sugar, butter, and salt. Stir and cook over a medium heat. As soon as the mixture starts to thicken, about 5 to 7 minutes, take about 3 tablespoons out and mix with beaten egg to temper the egg. Whisk together then pour back into pan. Whisk fast to incorporate the egg mixture. Continue to cook the rice pudding until it comes to a gentle boil. Keep whisking so it doesn’t burn. When thickened, take off heat and add vanilla. Whisk gently. You can eat warm or let cool. Once cooled. Store in fridge up to 2 days.
- If pudding becomes too thick, you can thin out with a few tablespoons of milk.


Creamy Dreamy Rice Pudding
Ingredients
- 1 3/4 cups cooked long grain rice I used Veetee https://www.veetee.com/us/
- 2 cups whole milk
- 1/4 cup granulated sugar
- 1/2 tsp sea or kosher salt
- 1 1/4 tsp vanilla extract
- 1 egg lightly beaten
- 1 tbsp unsalted butter
- 1/4 tsp cinnamon, more for garnish, optional
- whipped cream, optional
Instructions
-
1.Cook 2 packs Veetee long grain rice in microwave according to directions. Fluff up with fork and measure 1 1/2 cups cooked rice. Save the rest for another favorite rice dish.
2.In a large saucepan, combine the milk, rice, sugar and salt. Stir and cook over a medium heat. As soon as the mixture starts to thicken, about 5 to 7 minutes, take about 3 tablespoons out and mix with beaten egg to temper the egg. Whisk together then pour back into pan. Whisk fast to incorporate the egg mixture. Continue to cook the rice pudding until it comes to a gentle boil. Add in butter. Keep whisking so it doesn’t burn. When thickened, take off heat and add vanilla. Whisk gently. You can eat warm or let cool. Once cooled. Store in fridge up to 2 days.
Recipe Notes
Thanks for stopping by. I hope you enjoyed today’s featured recipe. Be sure you scroll up to print out the recipe. You can pin this and any recipe on Pinterest to save for later on.
Please stop back soon, there’s so many more recipes to see both sweet and salty.
Bye for now…

Disclosure: You may see links to ingredients or cooking items in the ingredient, instructions, or equipment sections of this post. I’m a participant in the Amazon Services LLC Associates Program, an affiliate advertising program. I will receive a small percentage of sales generated by these links. However, this in no way increases the price of the items.