
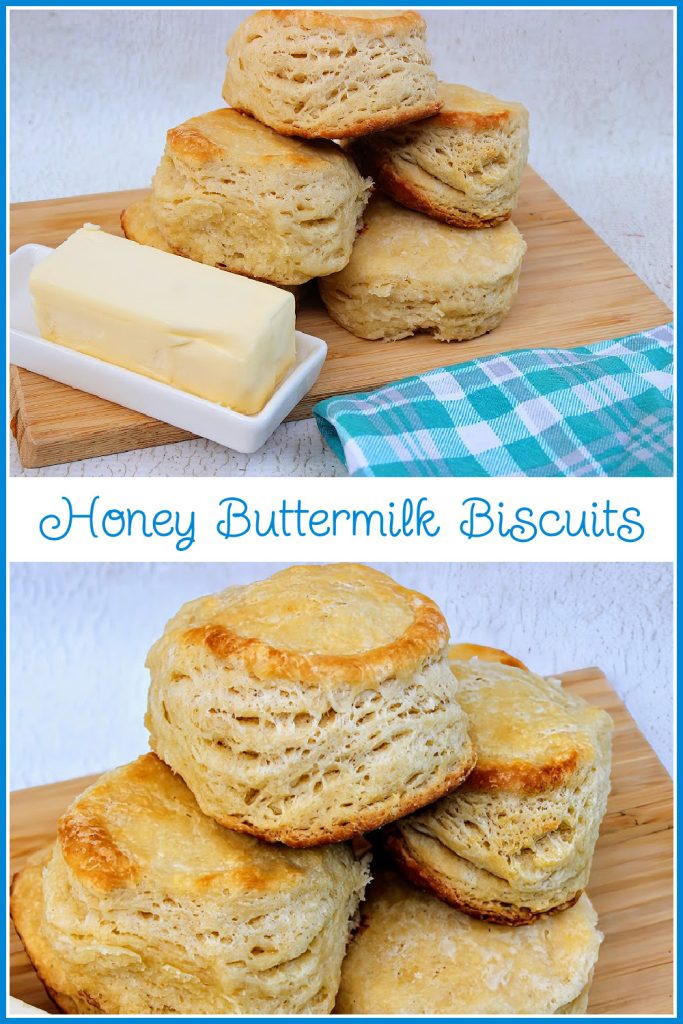
Honey Buttermilk Biscuits
Calling all biscuit lovers! You’re about to discover the best homemade biscuit you’ve ever eaten! My honey buttermilk biscuits take that classic flavor and flaky, tender texture of real, homemade buttermilk biscuits and add a hint of sweetness with honey. They’re the perfect start to the day with your other favorite breakfast options!
Biscuits are just about the best part of breakfast if you ask me. I love the fluffy, flaky, tender texture, and whether you’re slathering them with butter and jelly or stuffing eggs and sausage between them for a breakfast sandwich, they’re always a huge hit in the morning.
I love making biscuits all the time, and this time, I switched it up with a little added sweetness thanks to honey. It’s still a classic buttermilk biscuit recipe. I just added a little extra something something.
Why You’ll Love This Recipe
- It only uses a few basic baking ingredients, and you probably have most of all of them in your kitchen right now.
- It’s an easy recipe that only takes a few minutes to make.
- The natural sweetness of the honey adds a wonderful note to the biscuits.
- These biscuits are delicious with all your favorite breakfast items.
Ingredients
You’ll only need a handful of simple ingredients to make these biscuits. It’s a classic recipe with one added ingredient.

For the Biscuits
- 2 1/2 cups all-purpose flour plus a bit more for dusting when rolling the dough
- 2 tablespoons baking powder
- 1 1/2 teaspoons salt
- 1 1/2 tablespoons honey
- 1 stick (1/2 cup) unsalted butter – frozen
- 1 1/4 cups buttermilk
For Brushing Before Baking
- 1 1/2 tablespoons buttermilk
- 1 1/2 tablespoons unsalted butter – melted
- 1/8 teaspoon salt
- 1 1/2 teaspoons honey, this is optional


How to Make Honey Buttermilk Biscuits
This is an easy, rustic recipe that only takes about 30 minutes to make from start to finish. It’s fully homemade, so there are a few steps, but they’re not complicated. You’ll have no trouble at all with these!
- Preheat the oven to 425 degrees.
- In a large mixing bowl, whisk the flour, salt, and baking powder. Then, grate a stick of frozen butter into the dry ingredients.
- Using clean hands, work the butter and flour mixture until it resembles coarse crumbs.
- Make a well in the center of the dry ingredients and add the honey and buttermilk, then stir until just combined. Don’t overmix!
- Turn out the dough onto a clean work surface dusted with flour and gently knead once or twice and pat into a scraggily rectangle.
- Fold the sides into the middle of the dough, then turn it and repeat with the other sides.
- Roll the dough lightly after folding it, then repeat the process to create layers in the biscuits.
- Roll out the kneaded and folded dough into an 8-inch rectangle about 1 1/2 inches thick.
- Cut the biscuits out with a 2 to 3-inch cookie cutter, biscuit cutter, or mason jar rim.
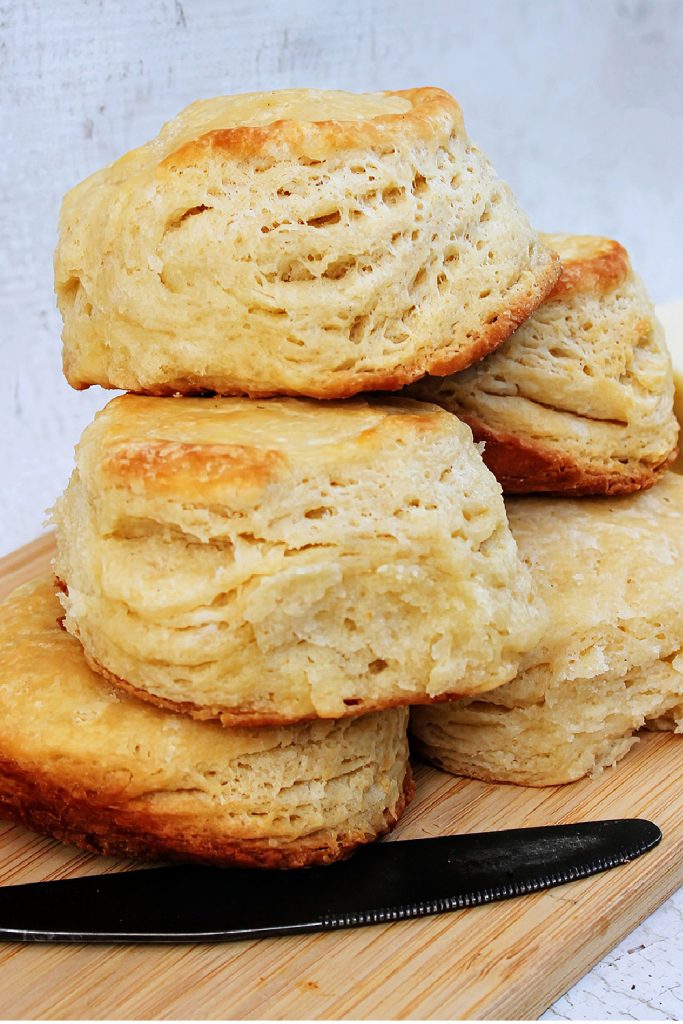
- Place the biscuits in a baking dish so that their sides touch. This is what makes them nice and tall!
- Repeat the process with the scrap dough until you’ve made as many biscuits as possible.
- Mix the melted butter and buttermilk with honey if using in a small bowl and brush over the biscuits. Then, bake for 14 to 18 minutes until golden brown.
- ENJOY!
Substitutions and Variations
- If you don’t have buttermilk, mix 1 tablespoon of vinegar or lemon juice per 1 cup of milk and let it sit for about 5 minutes. Instant buttermilk! This can be done with almond milk too.
- If layers aren’t a priority for you, simply knead the dough, roll it out, and cut out the biscuits for a more classic version.
- If you’re gluten-free, use a 1:1 gluten-free flour and follow the instructions in the same way you would for regular flour.
Equipment
- Measuring cups and spoons
- Mixing bowl
- Baking dish
- Clean, flat surface
- Cookie or biscuit cutter
Storage
Store these biscuits at room temperature for up to 2 days in an air-tight container. For longer storage, freeze for up to 2 months in an air-tight, freezer-safe container.
Defrost the biscuits on the counter and give them a few seconds in the microwave before serving. You may also want to place in a warm oven to bring back the crisp. Do this only a few minutes with the oven set at 300 degrees.
What to Serve with Honey Buttermilk Biscuits
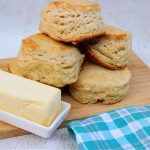
Serve these biscuits with butter and jelly or pair them with your favorite breakfast items like sausage, bacon, and eggs. Of course, be sure to have a glass of milk or a cup of coffee on hand.
Tips
- Mix your ingredients until the wet and dry are just combined, meaning everything is moistened. That’s the key to soft, flaky biscuits.
- Your final biscuit will most likely look wonky. That’s okay. Don’t stress, just eat it first!
- BE SURE you place your biscuits so they are touching while they bake. This makes them get even taller and fluffier.
More Honey Recipes
- Honey Glaze Chicken Breasts and Thighs
- Copycat Starbucks Honey Flat White
- Gluten-Free Cinnamon Honey Muffins
FAQ
They sure are! Thanks to canned biscuits, most people think layered biscuits aren’t true biscuits, but that’s not true. Layered biscuits are true, authentic buttermilk biscuits. The only difference is that the dough is folded by hand as it’s kneaded to create flaky layers.
You don’t have to use buttermilk for biscuits, but you should. Buttermilk adds a classic tangy flavor and helps the biscuits rise more, creating a light, fluffy texture.
Biscuits originated from Europe. Many years later, biscuits evolved into a Southern staple mainly because they were made with simple ingredients like flour, milk, butter, and salt. Also, biscuits were a very simple and easy recipe for any home cook. Nowadays, biscuits are lighter, fluffier, and flaky from the right amounts of ingredients and rolling out the dough.
Thanks for stopping by. I hope you enjoyed the recipes featured today. Please stop back again soon. There are so many more to see and new ones too. To save any of your favorites be sure to pin on Pinterest. It’s a great way to save for later on.
Bye for now…

Honey Buttermilk Biscuits
These biscuits come out so flaky and delish. Using a basic recipe with everyday ingredients, makes the best biscuits!
Ingredients
- 2 1/2 cups all purpose flour, more for dusting when rolling
- 2 tbsp baking powder make sure it's fresh
- 1/2 tsp fine salt
- 1 1/2 tbsp honey
- 1 stick frozen unsalted butter
- 1 1/4 cups buttermilk
For brushing before baking
- 1 1/2 tbsp buttermilk
- 1 1/2 tbsp melted butter, if unsalted use a quick dash of fine salt
- 1 tsp honey, this is optional
Instructions
-
Preheat oven to 425 degrees
In a large mixing bowl, combine flour, salt and baking powder. Use a whisk to combine well.
Grate a stick of frozen butter into the dry ingredients.
Using clean hands, combine ingredients into coarse crumbs. Make a well in the middle. Add honey and buttermilk. Stir until all ingredients are incorporated. Try not to overmix.
Sprinkle the work area and place your dough in the middle, gently knead it until you have formed a scraggly rectangle.
Fold the sides into the middle then turn the dough, and repeat with the other sides.
Roll the dough lightly, then repeat the folding process. This creates the layers of the biscuits.
Roll the dough gently into about an 8 inch rectangle, aiming for 1 ½’ thickness.
Cut the dough with a 2 or 3” cookie cutter, biscuit cutter or even a mason jar rim.
Place the biscuits into a baking dish so that they are touching each other. This is important. If your biscuits aren’t touching they won’t get as tall.
Gather the scrap dough and shape it into a square, rolling gently as needed and cut as described above until you are out of dough.
Your last biscuit is likely to be misshapen, that is okay. That one is meant to be taste tested right out of the oven!
Combine the melted butter and remaining buttermilk in a small bowl. Add in the honey if using.
Brush the biscuits with mixture.
Bake for 14-18 minutes or until golden brown.
Enjoy warm from the oven!
You can store leftovers in an airtight container for 3 days.
These freeze well up to 2 months.
Disclosure: You may see links to ingredients or cooking items in the ingredient, instructions, or equipment sections of this post. I’m a participant in the Amazon Services LLC Associates Program, an affiliate advertising program. I will receive a small percentage of sales generated by these links. However, this in no way increases the price of the items.