4 Ingredient Sugar Cone Teepees
This is such an fun and easy 4 ingredient sugar cone teepees project. Make some for your holiday dessert table. Everyone will love them and the kids will really enjoy making them with you.
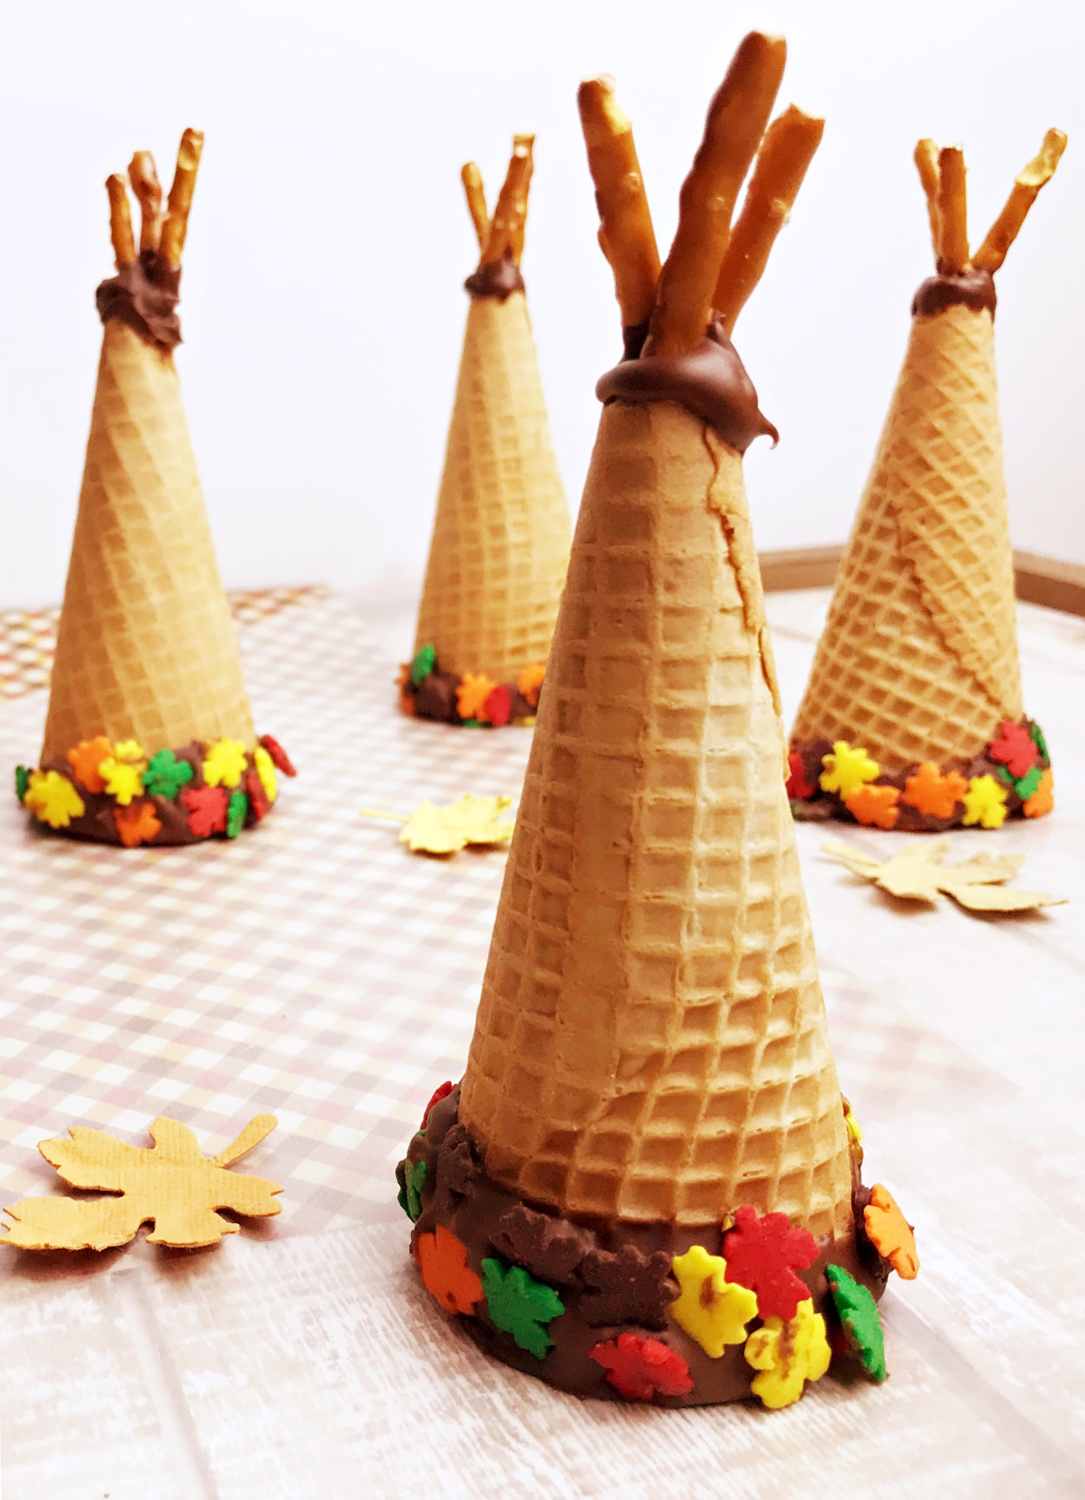
These adorable and oh so yummy teepee cones have become a tradition for all the kiddos in my extended family.
They do however, need adult supervision for the melting of the chocolate. Then, when the heated chocolate is poured into a separate bowl, the kids can start dipping the cones. Still, an adult should be keeping an eye out.
My kids are older but, they still like making these with the little ones or helping them out.
It’s a fun edible food craft project that even the adults look forward to each year.
We all enjoy making them with the kids or just watching them to show how we appreciate and proud we are of them.
They happen to taste really delicious too. Because, this fun food project happens to come out tasing so delicious.
Perfect for Thanksgiving day while everyone is still getting ready and you want to enjoy some quiet time with the kids and making a dessert that everyone will want gobble up.

Change around the sprinkles for any occasion. It’s an easy and fun food craft that may become a family tradition with your family too.

What 4 Ingredients Goes Into These Adorable and Delicious Teepee Sugar Cones…
*Please note: I didn’t add amounts for the ingredients. However, you decide how many you will be making that day. You can always add more chocolate to melt if you run low. Milk chocolate melts easily.
- Ice cream sugar cones
- milk chocolate morsels or chocolate almond bark work best. but, if you like semisweet chocolate, use the dark chocolate candy melts for best results
- pretzel sticks
- leaf sprinkles, found at craft stores such as Michael’s (Use any sprinkles you like for another occasion)

How To Make These Fun Looking 4 Ingredient Sugar Cone Teepees…
*Fun and easy and totally delectable!
- Line a baking pan with wax or parchment paper.
- Cut in half a pretzel stick for each ice cream cone. You will also need one whole pretzel stick for each ice cream cone. These will be placed at the top of the teepee. Set aside.
- Carefully cut the point of each ice cream cone, removing about ½ inch allowing enough room for one pretzel stick to pass through the opening. Set ice cream cones aside.
- In the microwave, melt the milk chocolate morsels in a small microwave-safe bowl on high in 30 second increments, stirring well between each cycle and giving special care not to overheat the candy. If the chocolate is overheated or comes in contact with water, it will seize up and be unusable. Stir between each heating. This also makes the chocolate shiny.
- Dip the large opening of each ice cream cone into the melted chocolate about 1/4 inch and remove from chocolate using a spoon to scrape out any extra chocolate. Drop sprinkles onto the chocolate ring, gently pressing them into place. Dropping the sprinkles instead of rolling the cone creates less mess and results in a neater teepee. Immediately place the ice cream cone on the waxed paper.
- To assemble the top of the teepee, dip a whole pretzel stick into the melted milk chocolate about halfway. Without removing the teepee from the waxed paper, gently slide the pretzel stick into the cut opening of the ice cream cone and angle the pretzel to rest against the inside of the cone. Some of the chocolate from the pretzel stick will remain at the opening of the cone. Next, take two pretzel stick halves and slightly dip one end of each into the melted chocolate. You only need a drop of chocolate as the pretzel stick pieces will attach to the melted chocolate left at the opening by the whole pretzel stick. Place the pieces at the top of the teepee next to the other pretzel stick and hold in place until the chocolate has set enough to move your hands without the pretzel stick falling.
- When all teepees are dipped and decorated, place in the refrigerator or freezer until the chocolate is set, about 20 minutes or so.
Recipe note: Store in an airtight container at room temperature. Placing in the refrigerator for an extended amount of time may cause the cone to soften. Best when eaten the same day.
Hope you have fun making these sugar cone teepees. After, take a big crunchy bite.

Here is another fun Thanksgiving food craft to make with the kiddos. You’ll love these too…
No Bake Thanksgiving Cookie Project


4 Ingredient Sugar Cone Teepees
Ingredients
- ice cream sugar cones
- milk chocolate chips, or use semisweet
- pretzel sticks
- colored sprinkles, for this recipe we used leaf sprinkles
Instructions
-
1. Line a baking pan with wax or parchment paper.
2. Cut in half a pretzel stick for each ice cream cone. You will also need one whole pretzel stick for each ice cream cone. These will be placed at the top of the teepee. Set aside.
3. Carefully cut the point of each ice cream cone, removing about ½ inch allowing enough room for one pretzel stick to pass through the opening. Set ice cream cones aside.
4. In the microwave, melt the milk chocolate morsels in a small microwave-safe bowl on high in 30 second increments, stirring well between each cycle and giving special care not to overheat the candy. If the chocolate is overheated or comes in contact with water, it will seize up and be unusable.
5. Dip the large opening of each ice cream cone into the melted chocolate about 1/4 inch and remove from chocolate using a spoon to scrape out any extra chocolate. Drop leaf sprinkles onto the chocolate ring, gently pressing them into place. Dropping the sprinkles instead of rolling the cone creates less mess and results in a neater teepee. Immediately place the ice cream cone on the waxed paper.
6. To assemble the top of the teepee, dip a whole pretzel stick into the melted milk chocolate about halfway. Without removing the teepee from the waxed paper, gently slide the pretzel stick into the cut opening of the ice cream cone and angle the pretzel to rest against the inside of the cone. Some of the chocolate from the pretzel stick will remain at the opening of the cone. Next, take two pretzel stick halves and slightly dip one end of each into the melted chocolate. You only need a drop of chocolate as the pretzel stick pieces will attach to the melted chocolate left at the opening by the whole pretzel stick. Place the pieces at the top of the teepee next to the other pretzel stick and hold in place until the chocolate has set enough to move your hands without the pretzel stick falling.
7. When all teepees are dipped and decorated, place in the refrigerator or freezer until the chocolate is set. About 20 minutes should do it. Enjoy!
Store in an airtight container at room temperature. Placing in the refrigerator for an extended amount of time may cause the cone to soften.

Thanks for stopping by today! I hope you enjoyed the featured recipe for 4 ingredient sugar cone teepees. They sure are fun to make and taste so yummy.
Please stop by again soon. There are so many more recipes to see both sweet and savory.
You can save this recipe and any of your other favorites on Pinterest. It’s a great way to collect and save recipes for later on.
Remember to scroll up so you can print out the teepee recipe.
Bye for now…

Disclosure: You may see links to ingredients or cooking items in the ingredient, instructions, or equipment sections of this post. I’m a participant in the Amazon Services LLC Associates Program, an affiliate advertising program. I will receive a small percentage of sales generated by these links. However, this in no way increases the price of the items.